Meet the Staff
Staff Team
SalyaDarken Co-Admin Royal Designer Royal Designer Royal Designer Royal Designer
Royal Designer Royal Coder Royal Coder Royal Role-Player Royal Role-Player Royal Role-Player

Moderators
Events

Site-wide event
Mini Event: Grand Opening

RP Challenge
challenge title

Event title
Event title

Event title
Event title

Click the above icons for more info!

Links
Main Site Site Rules Canon List Discord --- --- --- --- Newbie pack Role-play Rules Game Hall --- --- --- --- ---

Chatbox
Featured Roleplay

RP Title
Lorem ipsum dolor sit amet, consectetuer adipiscing elit, sed diam nonummy nibh euismod tincidunt ut laoreet dolore magna aliquam erat volutpat. Ut wisi enim ad minim veniam, quis nostrud exerci tation ullamcorper suscipit lobortis nisl ut aliquip ex ea commodo consequat. Lorem ipsum dolor sit amet, consectetuer adipiscing elit, sed diam nonummy nibh euismod tincidunt ut laoreet dolore magna aliquam erat volutpat.


Interested? Read more here!

[Tutorial] how to make a 100x100 Icon/bumper (PS)

Find all of the artists & graphics-related classes, workshops, and tutorials here!
Post Reply
User avatar
SalyaDarken

Royal Admin
Class C
Posts: 236
Joined: 02 Feb 2025, 04:43
Location: Southern lands, reading with Mathias
Userbar: Image
Gender:
Contact:

[Tutorial] how to make a 100x100 Icon/bumper (PS)

Post by SalyaDarken »

I use PS CS6.

Click to see the photos bigger
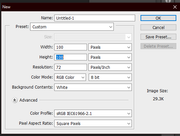
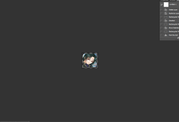
  1. Create a 100x100 file in photoshop
    Image
  2. Get an image. I'm going to use one of Soren's photos from the main site.
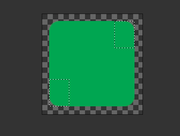
  3. Create a rounded rectangle with a radius of 10px and size of 85x85px. Color does not matter.
    Image
  4. Create a 20x27 rectangle (in the same color you used for the rounded one to make it much easier) and put it on the top right corner, replacing the rounded spot. Do the same for the bottom left corner. After this, Left click on any layer and select merge visible.
    Image Image
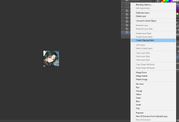
  5. Now for the fun part! Copy the image you want, paste it, adjust it or whatever, and add a clipping mask. Right click your pasted image, and a menu should appear, click on "create clipping mask".
    Image Image
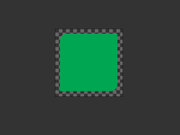
  6. Now add a stroke to the merged rectangle. Set it to 2px, and choose a color that matches your image.
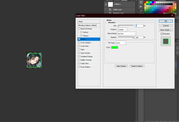
    Image
  7. Now add text!
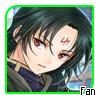
  8. Save the image as a png and here you are!
    Image
If you have questions, let me know. ^_^
#agtutorial
ImageImage Image Image Image

Post Reply

Return to “Classes, Workshops, and Tutorials”

Who is online

Users browsing this forum: No registered users and 1 guest